Friday 12 September 2014

Review: Clinique

I've been trying out a set of products which are new to me and thought I'd give my honest thoughts and opinions.
I have used clinique skincare for roughly a year now and love the way I can use them without any side effects to my hyper sensitive skin. A few weeks ago though I started having some really bad breakouts and had seen this product advertised and thought there's no real harm in trying. 
I will admit I don't fully go by the instructions but I do use them to get effective results. 


After about a week of use I saw less noticeable pores on my nose and my break outs were pretty much non existant. I continue to use the face wash once a week but use the toner and moisturiser every day in which I wear make up (I use micellar water to gently remove the majority of my make up as well as clinique "Take The Day Off" cleansing milk) 
If you're prone to breakouts or have visibly larger pores I do recommend giving these a try! It's available from Debenhams for £25
I buy the travel sets as it works well for my combination skin, I also have one for dry skin and dry/combination skin so I can swap out whicher suits my skin problems at that time.   

*disclaimer. These products were bought with my own money and all opinions are my own. Results may differ*

Gradi-addict

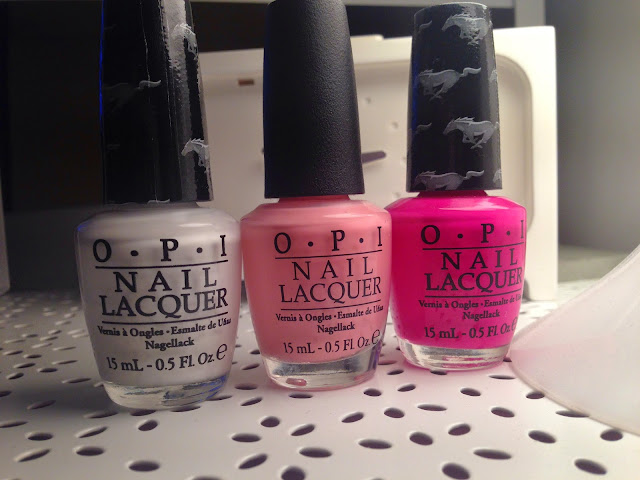
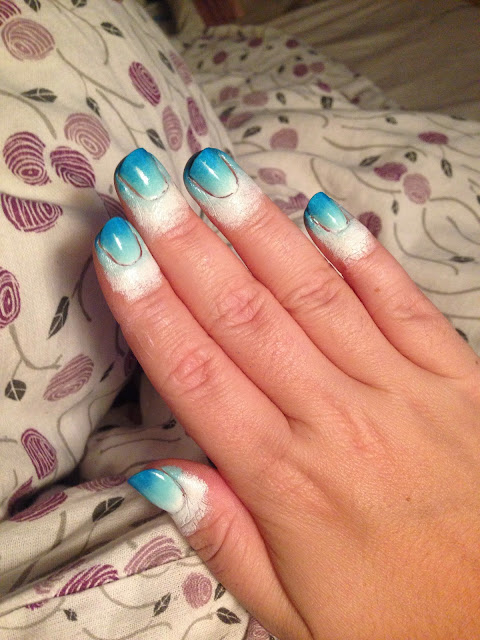
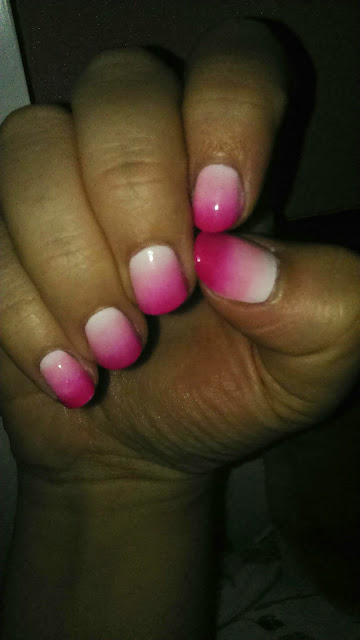
I must confess. I am in love. I keep falling back to the same base manicure and love how versatile it is. Gradients!! Simple quick and easy to do.
Think 95% of my recent manis have included a gradient!

I usually pick 3 colours as it creates a good blend and any more than 3 I feel my nails are too short to carry off.

I either pick colours from the same family (ie pinks, reds, greens) or a selection of colours to create a scene (like a sunset). I paint my usual base coat, followed by one coat of the lightest colour or white. Wait for this to fully dry then take a triangular make up sponge, dampen it slightly then paint 3 equal stripes of my chosen polish in the order I want them to be one my nail.

I then dab the sponge onto my nail in a horizontal rocking motion, I also move it up and down the nail slightly; this blends the colours better. I do one hand at a time. 

Work from thumb to pinky, reload the sponge then work from pinky to thumb. I repeat this until I've achieved the look I was after then top coat. I top coat whilst my gradient is still slightly damp and this also helps blend the polish better.

It can get pretty messy and people often use PVA glue or tape around their cuticles to reduce clean up but I don't get on well with these methods. 

Personally I use lint free wipes to take away the majority of the mess, go in with my clean up brush. Then I go in again with a lint free wipe and clean up brush for a second time to get a much cleaner and crisper mani. I also don't use acetone on my nail I use Sally's Beauty Non-Acetone Polish Remover, I get a huge bottle of it and it lasts months. Well worth it. 

When this is fully dried I either leave it as is. Or I add stamping. Stamping is another love of mine and so many versatile plates about now you can do so much.

I've even created gradients within the stamping. 

I have also done a technique known as reverse gradient. Where you cover parts of your nail with striping tape or vinyl patterns and sponge in the opposite way to which you sponged initially. For example if your lightest colour in your initial stamping was at your cuticle, for the reverse gradient it will be at the tip of your nail.

As always please subscribe. Follow me on instagram @cara_mia88 for lots of nail pictures but also random snippets of life!

Sunday 7 September 2014

My Second Passion

If you follow me on instagram you'll know I love taking pictures. Often random things or of what I've been doing around my apartment. But I'm a sucker for a selfie. If anyone had access to my camera roll they'd think I was completely self centred. But as most of you know to get the one good picture you take ten dozen crap ones!

I love experimenting with make up, but in everyday wearable styles. A pop of colour here. Eyeshadow for eyeliner. So thought I'd stray from nails for a post and share my current obsession for my make up.

I've done bold colours as eyeliner in the past but seen a new trend eeking in of colour along the lower lash line. I had to try it and I have to admit I love it! I do a nude look on my lid, with a very thin streak of liner (which is usually eyeshadow for me as I find it lasts better) then a dash of colour along the lower lash line and blend it out. Yesterday I did orange which I liked but I had a comment saying I looked like the walking dead when they bleed from their eyes (I didn't take offence it made me laugh a lot!) but today I tried a blue/green/turquoise colour and love the outcome. I blended into slightly so the colour gave the slight cat eye flick rather than the black!

The products I used were:
Benefit -
       Porefessional. As initial primer to even out my skin.
        Boi-ing concealer in 02 to hide some blemishes and disguise my under eye bags.
        Stay Flawless 15 Hour Primer  to create an even base for my BB cream and help my make up last the day for work.
        Big Easy BB Cream in Medium. Love this BB cream, liquid to powder and lovely coverage. Great to use on its own or layered with foundation
        They're Real Mascara. My all time favourite mascara. Long lasting. Non flaky. I have long curly lashes anyway and usually struggle with having my mascara not last well or clump. This is perfection!
         Hoola Bronzer. This is a new buy for me but a big wishlist item for a while. I love bronzes but not keen on shiny ones. This is matte and great for contouring as well as giving an all over bronzed feel.
  My eyeshadows all come from Urban Decay. Urban Decay and Benefit are my weakness (as you can probably already tell!)
         Upper Lid: From the Naked 3 pallet I used "Strange", "Limit" and "Buzz" in horizontal lines up from my lash line and blended together to get a nude yet warm look. I then used "Blackout" from the Naked 2 pallet as a thin streak of eyeliner along the lash line.
          Lower Lid: From the Electric Pallet I used "Gonzo" I took an eyeliner brush and as close to my lash line I did a thin streak, I then took a fluffy eyeshadow brush and blended out a little. I did this a few times to build up the intensity of the look I wanted then went in again with my eyeliner brush and brought Gonzo up and did a cat eye style flick.

I will definitely be recreating this look and using lots of my other colours in my Electric Pallet!
Let me know if you want more make up looks and I'll post them in with my nail creations too.

As always please subscribe. Follow me on instagram for more updates and randomness from me @cara_mia88

Something A Little Different

I think most of us can safely say that we love gems, studs, embellishments of many kinds. I've used vinyl templates to do different patterns and the most popular being chevron. 
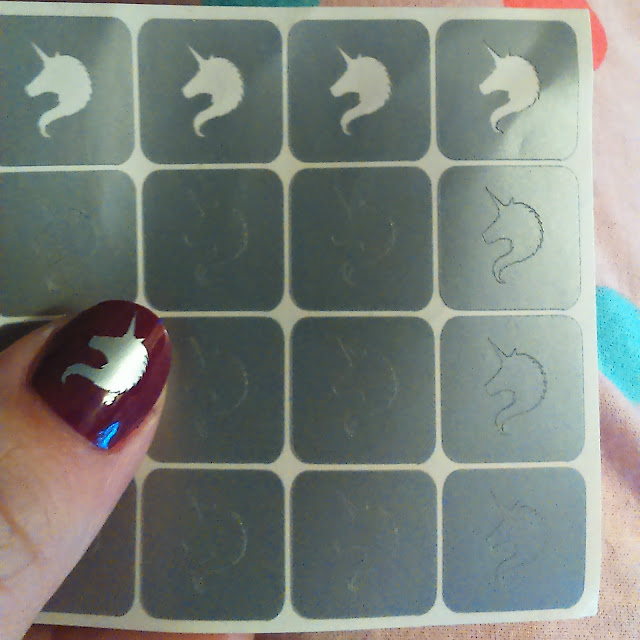
I recently bought some awesome unicorn (YES!! UNICORN) vinyls from She Sells Seashells. They can be used as stickers or as templates. 
Lots of wonderful nail items are available from www.she-sells-seashells.Co.uk fantastic array to suit every style, brilliant customer service and brilliant postage timings!


Tonight I used them as a stickers and love the outcome. I added a little glitter to my mani too as what goes better with unicorns than glitter!?

My base colour is OPI Get Cherried Away from their recent Coca Cola Collection. This gorgeous colour is an easy 2 coats and I followed this with a glossy top coat. The only negative I have to say about this polish is the clean up, like and dark colour it is a trickier clean up than lighter colours but it did clean up nicely using acetone and my clean up brush. I purchased a few of the Coca Cola Collection from TNBL website which is a great online store with very good prices on all the latest collections. 


As always please make sure you subscribe. Also follow me on Instagram @cara_mia88 for more updates as well as some very random thoughts/pictures. 

Saturday 6 September 2014

My Love Of Stamping

Most people who follow me on instagram will know just how much I love stamping. It's a quick and easy way for me to have something a bit different on my nails without having to sit there for hours doing it all by hand.

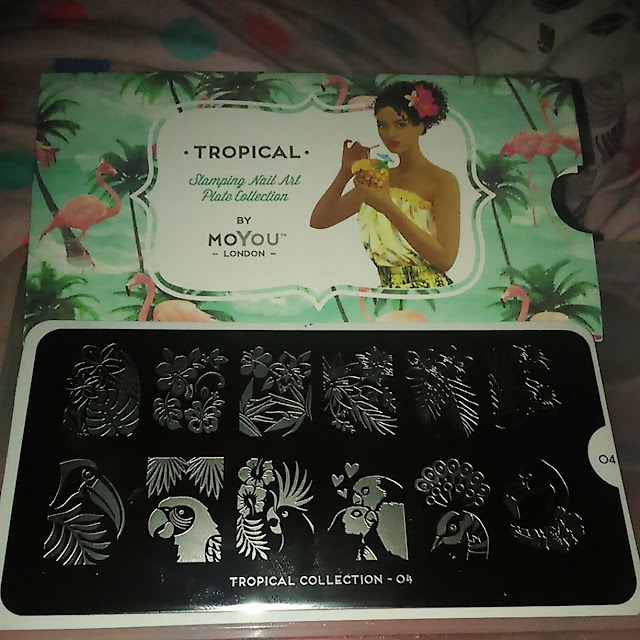
So last night I had a bit of a play with one of my new Moyou London plates.
(Tropical 04 XL)

My base colour is Nails Inc Optic Wave. This polish came free with a colgate toothpaste I purchased from Boots a while ago. Lovely formula, 2 coats and top coat and it's good to go!

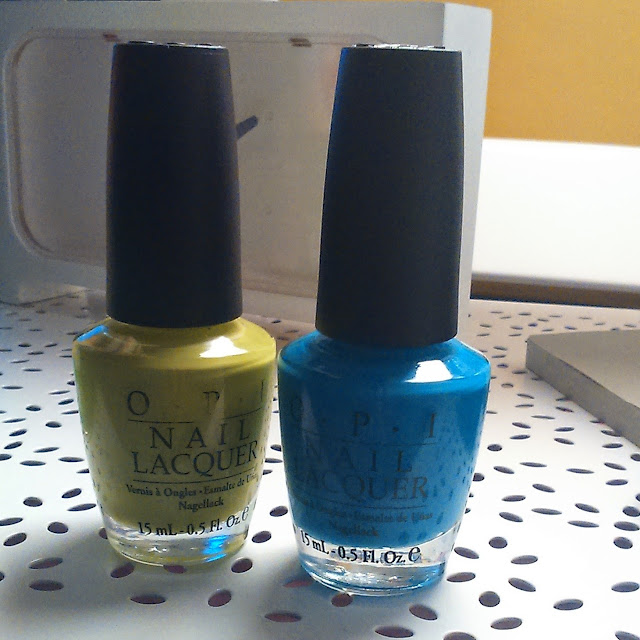
I chose 2 "new to me" polishes that I've purchased from some personal destashes friends have had. Both by OPI; Ogre The Top Blue and Who The Shrek Are You.
These stamped lovely as they're such opaque colours they pop which is what you want from stamping polishes!

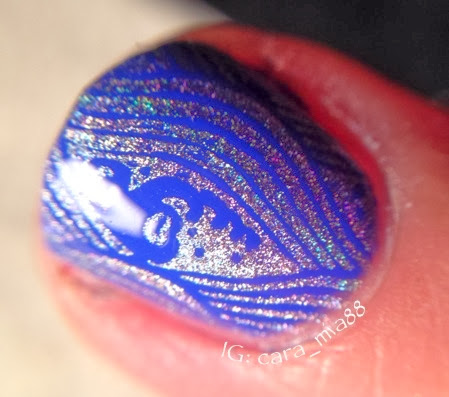
Here's what I came up with.

Summery but not too OTT.

More looks coming up soon so please make sure you subscribe to my blog and follow me on instagram @cara_mia88 for posts and updates!


Friday 22 August 2014

Where Has This Year Gone?!

Well first of all I must apologise for being AWOL for pretty much the majority of this year. I just noticed my last blog post was back in February. How embarrassing.
There's been a few reasons why I haven't been great at blogging the past 6 months.
1. I was looking to move house back in Feb and I actually moved 21st April into my new place. This was so much harder than I ever expected as I had been told by Dr's and my physiotherapist to not do any lifting or twisting. Well as a single mum I had to pack up the old place pretty sharpish! So I was a bit naughty then. My new place is also up a couple of flights of stairs. Again not great for me and my back. I had help the 1st two days in varying degrees from my older brother, stepdad and my dad but the third day I was left to clear the last of the stuff from my old property and make good the walls etc with a 6 year old to entertain too! Took me a long time to recover after moving and I'm still slowly unpacking now!
2. Writers block and lack of space. Due to the move I didn't have an area to do my nails or even a space for my polish. It actually spent the best part of a week in my car downstairs!!
3. My back. Due to a combination of pain and painkillers I've either been too unwell or too uncomfortable to blog or to sit and do my nails. I actually had an MRI scan a few weeks ago and received my results this week. I have vertebrae out of alignment and 2 bulging discs, one of which is causing nerve damage. This makes it very uncomfortable for me to sit in any position for any period of time and I generally am propped up in bed as it's comfier than the sofa/chair. I've been referred to a neurosurgeon and now it's just a wait for my appointment to come through. There's only really 2 options; surgery, or regular injections. As there's no hospital near me that can do this I'm actually hoping surgery is an option.

Anyway. I'm hoping to be more active on my blog now things are a little more settled and hoping I can do nail art a bit more often (even if it's not the most intricate of designs!)

Until next time!

Friday 7 February 2014

CaraBella Lacquer

Been neglecting the blog a little and I'm sorry! Been so busy with my mini pre-launch for CaraBella Lacquer.  
I have a mini duo out for valentines day and am busy mixing and creating ready for my launch at the end of March. I'm so excited to show you!!
For now here are some pics of my duo available from www.etsy.com/carabellalacquer

My first international customer! I am trialling it currently and hope to roll out international orders in the near future! (Photo credit IG: @christinastalents creator of @partygirllacquer)

My first UK order! (Photo credit to IG @vickijo82) Show Us Your Pinkies with an accent nail of SUYP topped with Everyone Loves Glitter

And these gorgeous swatches of SUYP and ELG come from @jemmypuddleduck creator of Chubby Owl Polish!

And finally some ace bottle shots from @Christinastalents

As always please follows blog. Follow me on IG as either @cara_mia88 or @carabella_lacquer 
Also Facebook is www.facebook.com/carabellalacquer
And for CaraBella Lacquer orders it's www.etsy.com/carabellalacquer

Sunday 26 January 2014

Nail Growth Progress - Week 3

Sorry for no post last week! Been SOOOOOO busy with deliveries and testing for my indie polish line I'm releasing soon. But wanted to do an update this week after I'd numbed my nails three weeks ago!
Sooo....
Here they were 2 weeks ago

And here they are now! Pretty impressive growth I believe lol

I want to start taking my supplements again this week, been slacking with that recently! Still using my mix of Essie Grow Stronger and OPI Nail Envy, but just ordered myself some Essie Millionails, look forward to seeing how this compares to my other products. I also hope to do a review on this product, let me now if you'd be interested!

Don't forget to follow my blog, on IG as @caramia_88

AND also follow my Indie Polish page @carabella_lacquer for sneak peeks and release date!


Monday 13 January 2014

Nail Growth Progress - Week 1

Soooo it's been a long little week since my über nubs made their first appearance. So I'm posting a little update. (I'm hoping I can delude myself that there will be a good growth!)
Here is my nubs last week as a reminder:

And here they are now!!

Noticeable growth? Yes? No? So impatient at times lol! I can see growth on some nails more than others but pleased with the progress after just one week in all honesty! (And I've been forgetting to take my supplements! Whoops!)

Please remember to subscribe to my blog and receive the latest updates first! Also follow me on Instagram @cara_mia88

Sunday 12 January 2014

More Stamping Shenanigans!

What do you do with yourself when you can't sleep? Paint you nails? No? Just me?
Well last night my daughter decided that she didn't want to go to bed, and finally passed out around midnight. Which meant that I was up late and over tired. Which led to some nail art. 
I've been trying to get through my untried polish each time I do something with my nails and this mani combined Essie Butler Please and Miss Fancy Pants (both untrieds) and Nails Inc Westbourne Park. 

Essie Butler Please has been a lemming of mine for a while, it's a gorgeous blue. But I am not a fan of the application. It was very thin to apply, although it does give good colour in the end I did have to apply 3 coats!! Miss Fancy Pants is a perfect nude. I have LOTS of nudes and this was great in 2 coats. Adding this to my trusted nudes!

Think the hardest part was choosing which stamp to use!
I had just bought several new plates from MoYou London and wanted to use a new image. The Suki plate was definitely calling to me and I chose the middle image above. (I wanted to use the fairytale collection but out of principal I'm not using those yet...I'll explain at the end!)

This was my finished mani! I knew I wanted holo stamping over the blue but became stuck when it came to the nude. I couldn't decide between blue or holo stamping. Took me 30 minutes to decide! Glad I went with the blue though!

And because I can and because I LOVE to macro all the polish here's a few close ups to show the details of the stamp I used. 
I love this image, looks like a fingerprint on my nail, with a cute little heart detail!
And Westbourne Park is THE perfect stamping holo I own. The holo is so dense you get a perfect image in the one coat (which is needed when stamping as you can't do a second coat easily!) 
This picture I purposely took slightly dark so that the holo and stamping detail could be seen. This is probably my favourite image out the lot of them! 

Love the overall look of this mani. It's clean and simple yet not plain and boring!! 

Oh and as I said earlier in this post I have some of the Fairytale Collection from MoYou London too. But they were sent without sleeves, I had no idea they wouldn't have them until they arrived and was a little annoyed to say the least. I then emailed customer services to which their reply was "when you place your next order send us an email and we will include the sleeves" I do not think it's fair I've paid full price for half an item to be delivered and then being told to spend more and I will be sent something I should've been sent originally anyway? Not cool MoYou, not cool. I have emailed them again saying I won't be placing an order again for a while and want the sleeves to be sent out right away, but after reading others comments on MoYou's (lack of) customer service, I'm not holding my breath for a reply or even the sleeves. It's this experience that has put me off buying from them in the future as nothing was said about lack of sleeves at all and the first I knew about it was half a product turning up at my door. And their reply was a little rude to be honest (and they didn't even get my name right in the reply email!!!)
Anyway...I digress. 

Please remember to subscribe to my blog and follow me on Instagram @cara_mia88

Thanks for reading!

Tuesday 7 January 2014

Sindie Pop Swatch

Ok so I know this polish isn't new in the world of indies but it is something beautiful that I just HAD to share!
Golden Raspberries has been a lemming if mine for a long time, but Sindie Pop Cosmetics do not ship to the UK (break out the violin here!) BUT I am lucky to have an amazing US friend who let me get my order sent to her and we forwarded it on to myself. Safe to say I squealed when my package arrived (She sent me an awesome package that really lifted my spirits. Pictures on my IG and video on my YouTube!)
Strangely even though I've had Golden  Raspberries for months, I haven't actually used it until now. So here, in all it's glory: Golden Raspberries by Sindie Pop Cosmetics!

Seriously worth the wait! Here it is in all it's macro glory! Because you know you have to macro all the polish!

Apologies for the awkward hand pose here but I've been posing for so long with my Cinderella hand I've almost forgot how to pose with my right had!! 

I love the varieties of golden glitters that are used in this polish, adds a gorgeous depth to the polish. And the base colour is just as gorgeous, in some lights it looks purple, others a wine colour, but each is beautiful. 
My swatches were two coats of Golden Raspberries topped with HK Girl Topcoat. 

Please remember to subscribe to my blog and follow me on IG for more updates!

Sunday 5 January 2014

Uh-oh! Nubbins Ahoy!

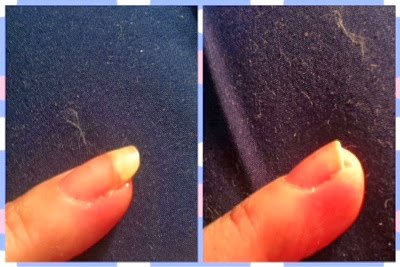
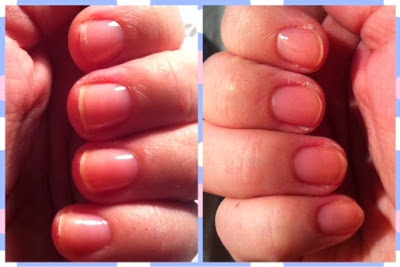
Bad news people! I had quite a bad nail break today which just wasn't salvageable and I've ended up trimming all my nails back so I can start a fresh. Three of them had split and were held on with glue so it was inevitable really. It feels so strange after having gorgeous long nails for so long to go back to my old nubs again! But I thought I could do a "track my progress" blog each week to see how well they grow back.
For a little perspective here is a before and after shot of one of my ring fingers:

And all my nubs in a pretty little row!

I will be using a combination of products; some old, tried and tested...some new and weird! I have been using a combination of OPI Nail Envy and Essie Grow Stronger for months now and it's a combination that seems to work for me as neither on their own worked. I also use Sally Hansen Nail Growth Miracle a few times a week. It's a serum that you rub into bare nails, or over polish a few times a week, it also helps with cuticle care. A new one I am trying is Avon  Nail Experts "diamond strengthening complex", this is a weird one for me as it looks like polish, applicator and everything, but smells strange and dried into my nails instead of onto my nail. Not sure if this works on too of polish like the Sally Hansen serum does as there were no instructions with the Avon product. 

Join me every Sunday to see how my nails are doing and some more in depth looks into my nailcare routine week by week.

Please don't forget to subscribe to my blog, lots of news coming up in the near future which I'm very excited about. Follow me on IG @cara_mia88 for lots more pictures including my polish collection and random snippets of my life!

Friday 3 January 2014

Polished By KPT Swatch

Ok so I love my indie polishes as some of you may know and they make up around 1/5th of my whole collection. 
Polished By KPT is in my top 4 most owned indie polishes and I have a gorgeous range of Thermal polishes from her that I absolutely adore. I've swatched majority of my collection in the past and these can be found on my Instagram page (@cara_mia88). 
Today I have a store exclusive colour called Siren's Song available in the UK from Rainbow Connection UK stockist. 

(Macro all the polish!)
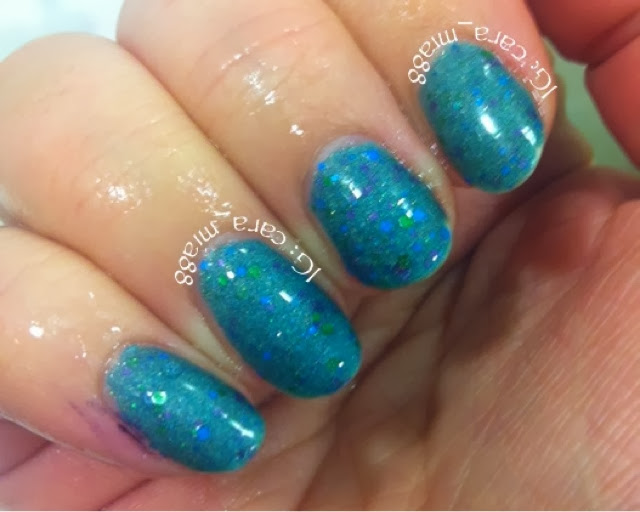
This is a gorgeous holo green colour shifting polish which changes to a pale green when warm. 
I used two coats of Siren's Song and topped it with Glisten & Glow HK Topcoat. I've been wearing this mani for four days now and am really pleased with the wear of all my Polished by KPT lacquer, including this exclusive colour. 

This is Siren's Song in its cold state! Gorgeous right?!

This is in the warm state. 

Transition from warm to cold. 

You can buy direct from @Polishedbykpt on Instagram or from @Rainbow_c_uk if you're in the UK. 

Don't forget to follow my blog, and on Instagram @cara_mia88